Tag Archives: exton

RaspEX for Raspberry Pi 3/2 – Build 170810 – based on Ubuntu 17.04 with LXDE and kernel 4.9.41-exton-v7+

NEWS 170810 about RaspEX for Raspberry Pi 3 and Pi 2
I have upgraded the whole system and replaced the old kernel 4.4.49 with “my own” compiled kernel 4.9.41-exton-v7+. RaspEX Build 170810 is a Linux ARM system for Raspberry Pi 3 and Pi 2. It is based on Debian 9, Ubuntu 17.04 and Linaro (Open Source software for ARM SoCs). In this new version (170810) I’ve installed Wicd Network Manager and replaced Chromium with Firefox with better support for YouTube. I have also installed Samba and VNC4Server so you can connect to your Windows computers in your Home Network and/or control RaspEX on your Raspberry Pi 3 or Pi 2 from your Windows computers with VNC Viewer and/or PuTTY (Telnet and SSH client). Furthermore some extra Network Tools, Midori Private Browser, SMTube (YouTube browser which allows to browse, search and play YouTube videos) and PulseAudio for better sound in YouTube. Study all installed packages in RaspEX Build 170810.

Compatibility :: August 2017

Unfortunately not all systems made for Raspberry Pi 2 will run on the new Pi 3. They need to be upgraded with a new kernel. I therefore have to upgrade the systems I distribute. I.e. RaspEX, RaspEX with OpenCPN, RaspAnd Lollipop, RaspAnd Marshmallow, RaspAnd Nougat 7.1.1, RaspAnd 7.1.2 and RaspArch. I have now (170810) upgraded all systems. Read about the new Raspberry Pi 3

Screenshot 1 – RaspEX connected to Windows via Samba

Screenshot 2 – RaspEX connected to Windows via PuTTy

Screenshot 3 – RaspEX “running on” Windows with VNC Viewer

Screenshot 4 – RaspEX running Blueman (Bluetooth Manager)

Kernel
Kernel 4.9.41-exton-v7 is used.

How do I install RaspEX in Windows?
Just like any other Raspberry Pi system. I.e.: Unpack the downloaded ZIP file (raspex-ubuntu-17.04-lxde-1190mb-170810.zip) and transfer the IMAGE file (raspex-ubuntu-17.04-lxde-3050mb-170810.img) to your Micro SD card of at least 8GB. For that you shall use Win32DiskImager in Windows.

SCREENSHOTS

Screenshot 1 – RaspEX connected to Windows via Samba

Screenshot 2 – RaspEX connected to Windows via PuTTy

Screenshot 3 – RaspEX “running on” Windows with VNC-viewer

Screenshot 4 – RaspEX running Midori Private Browser

Screenshot 5 – RaspEX using Pavucontrol (for sound)

Screenshot 6 – RaspEX running SMTube (search and watch YouTube videos)

Screenshot 7 – RaspEX running the Bluetooth Manager

Screenshot 8 – The Desktop 170810

READ MORE…

RaspAnd Nougat 7.1.2 for Raspberry Pi 3 – Build 170805 – with Google Play Store, Aptoide TV, Kodi 17.3 and Google Chrome

NEWS 170805 ABOUT RaspAnd Nougat 7.1.2 with Google Play Store working
I have finally managed to make a version of RaspAnd Nougat 7.1.2 (for Raspberry Pi 3), which has GAPPS installed and Google Play Store working. This version of RaspAnd can be installed in Windows using Win32 Disk Imager. The video performance is generally much better than in previous versions and the screen flickering is (almost) gone.

Download RaspAnd Build 170805…

MORE ABOUT RaspAnd
RaspAnd Nougat 7.1.2 Build 170805 is an Android 7.1.2 Nougat system which can run on Raspberry Pi 3. I have included the following apps:
1) GAPPS (Google Play Services with Google Play Store)
2) Kodi 17.3 (latest version which “allows users to play and view most videos, music, podcasts, and other digital media files from local and network storage media and the Internet”. YouTube is enabled and working very well!)
3) Spotify TV 1.4.0 (working very very well)
4) Google Play Games 5.2.25 (needed for Clash of Clans to run)
5) Clash of Clans is not included, but you can install it through Aptoide TV
6) Gmail 7.4.23
8) Aptoide TV 3.2.3 (for installing new apps which can’t be found on Google Play Store – many many apps can be installed!)
9) ES File Explorer 4.1.6.7.4 working very well
10) Google Chrome 59.0.3071 (latest version – working very well)
11) YouTube 1.3.11 with almost perfect video quality. Please don’t update YouTube to version 2.00.18 even though Google Play Store wants you to do it. If you do you will loose video quality. If you do it by accident just uninstall the update. (I.e. go back to the “Factory version”).

SCREENSHOTS
Screenshot 1 – Nougat boot animation (which you must see during the boot. If not, the installation was unsuccessful)
Screenshot 2 – RaspAnd’s Desktop
Screenshot 3 – Google Play Store running
Screenshot 4 – Kodi running Popcornflix
Screenshot 5 – Google Play Store running
Screenshot 6 – YouTube running
Screenshot 7 – YouTube running with perfect video quality
Screenshot 8 – Aptoide TV running (installing Google Drive)
Screenshot 9Spotify running
Screenshot 10 – Clash of Clans installs in Aptoide TV

READ MORE…

Run your Slackware installation with the latest kernel – 4.13-rc2!

SlackwareNEWS 170725
Kernel 4.13-rc2-x86_64-exton is my newest Slackware kernel. Kernel 4.13-rc2 was released by Kernel.org on July 23, 2017.

I have compiled a very useful (as I think) 64 bit kernel for Slackware Current (14.2) and/or all Slackware derivatives. For example Slax, Zenwalk and SlackEX. The kernel is compiled exactly in the same way as Slackware’s latest kernel huge. “My” kernel 4.13-rc2-x86_64-exton has even more support for new hardware, etc. Kernel 4.13-rc2 is the latest kernel available from Kernel.org. Released 20170723.

What’s new in kernel 4.13?

If you want to install my kernel in your Slackware 64 bit system, do this:

1. Download linux-kernel-4.13-rc2-x86_64-exton.txzmd5sum
2. Install it with the command installpkg linux-kernel-4.13-rc2-x86_64-exton.txz
(The kernel is packed just like Slackware’s original kernels so that everything ends up in the right place)
4. If necessary, change your Grub Legacy/Grub2 configuration
5. If you have an Nvidia graphics card in your computer, you may need to look over your files in /etc/modprobe.d before restarting the computer. That is remove the “blacklisting” of Nouveau’s kernel module in the appropriate files blacklist.conf and nvidia-installer-disable-nouveau.conf. With “my” kernel functions the Nouveau “free” driver works just fine.

NOTE: When you run the command installpkg linux-kernel-4.13-rc2-x86_64-exton.txz vmlinuz will be “created” in /boot. If you have /boot/vmlinuz already that file will be overwritten. In case you want to switch back to your old kernel you should make a backup of /boot/vmlinuz before you run the just mentioned command.

Restart your computer and enjoy!

ExTiX 17.7 with Budgie Desktop, Refracta Tools and kernel 4.11.0.10-exton

About ExTiX 17.7 with the Budgie Desktop
I’ve made a new extra version of ExTiX with Budgie Desktop. Budgie is focused on simplicity and elegance. Designed with the modern user in mind. Only a minimum of packages are installed in ExTiX Budgie. You can of course install all packages you want. Even while running ExTiX Budgie live. I.e. from a DVD or USB stick. Study all installed packages in ExTiX Budgie.

ABOUT ExTiX
All four ExTiX systems are based on Ubuntu and Debian.

Refracta Tools
While running ExTiX Budgie 17.7 live or from hard drive you can use Refracta Tools (pre-installed) to create your own live installable Ubuntu system. A ten year child can do it! Watch a slideshow below.

SCREENSHOTS
ExTiX Budgie Desktop with Spotify running
ExTiX Budgie Desktop – live
ExTiX Budgie Desktop – root
ExTiX Budgie running in VMware

READ MORE…

How-to dual-boot, triple-boot or multi-boot Linux with Windows in a simple way and be happy

How-to dual-boot, triple-boot or multi-boot Linux with Windows in a simple way and be happy…

In this instruction I will show you how easy it is to have several Linux systems installed on one computer together with for example Windows 10. The configuration is so simple a ten year old child can do it.

BACKGROUND
Ubuntu and all Linux systems based on Ubuntu (such as Linux Mint) uses Grub2 as boot manager. Also Debian and most other Linux systems use Grub2. Grub2 works differently from the old Grub Legacy.

UEFI BIOS and non-UEFI BIOS
The Extensible Firmware Interface (EFI) or its version 2.x variant, Unified EFI (UEFI) is a firmware type that is widespread on recent computers, especially those more recent than 2010Ubuntu wiki.

Configuring Grub2 – Example for non-UEFI BIOS computers
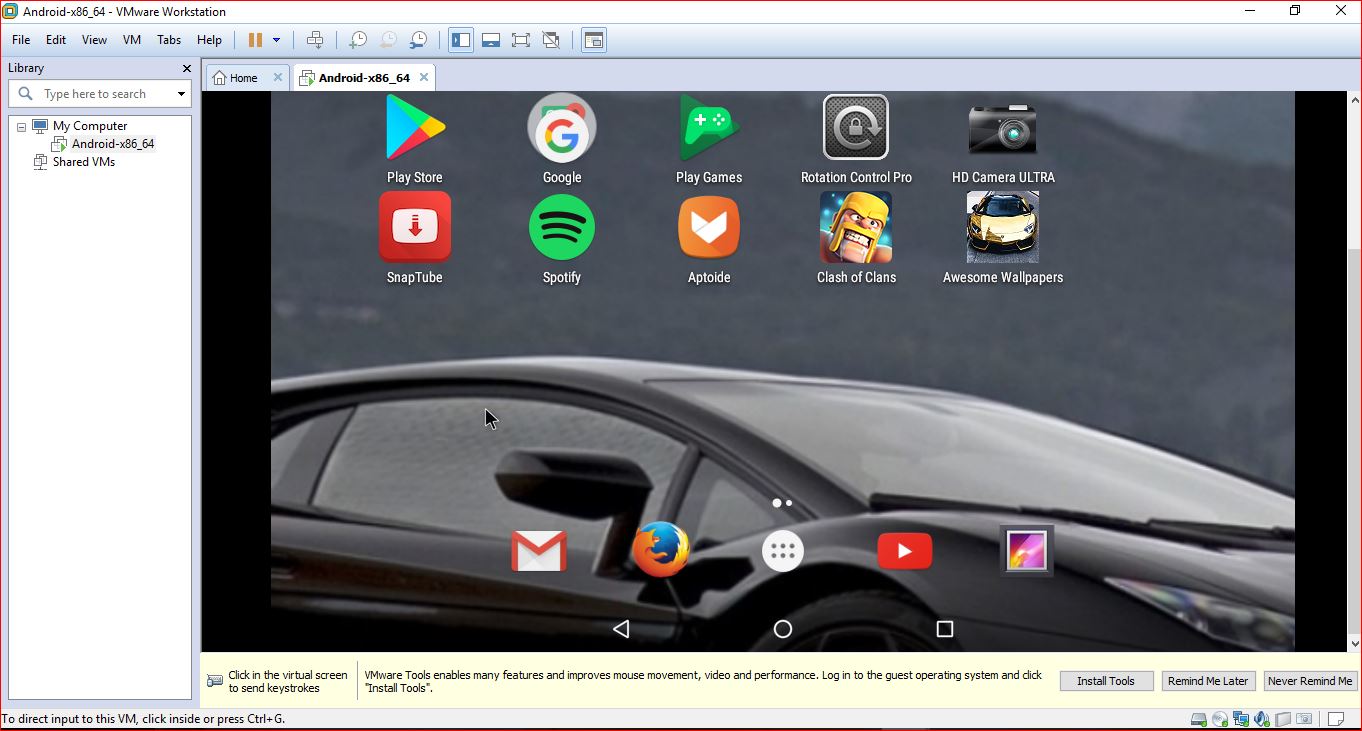
One of my computers, an Acer Aspire 5750G from 2010, has a 750 GB hard drive and an external USB hard drive of 1000 GB. On that computer I have Windows 10 and twelve (12) different Linux systems installed. Of those twelve systems three are Android-x86 systems (AndEX Nougat and AndEX Marshmallow). Below I will describe step by step how I configured Grub2 in the easiest way possible.

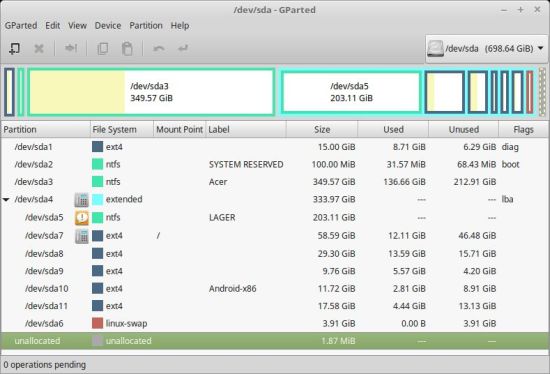
1. The computer was delivered with Windows 7 (now updated to Windows 10) preinstalled on /dev/sda2 and /dev/sda3. I immediately started up my computer from a Linux Mint Live DVD. Using GParted, I created seven new partitions on the internal hard drive and three on the external USB hard drive. After that I installed Mint on /dev/sda7 and Grub2 in MBR at the same time as the installer also suggested. Then I restarted my computer and checked that Mint (and Windows) could be started. Everything worked (as expected) fine. See the screenshots below showing how my partitioning looks like now.

The internal hard drive partitions
Note the 4 GB SWAP partition on /dev/sda6

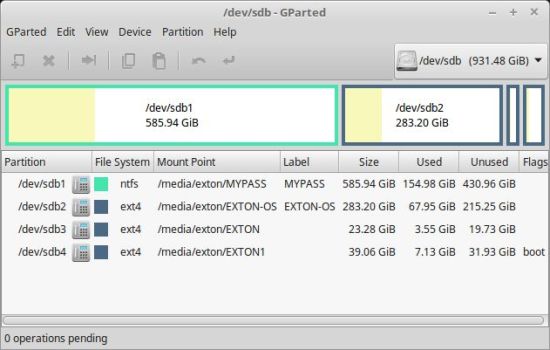
The external USB drive partitions

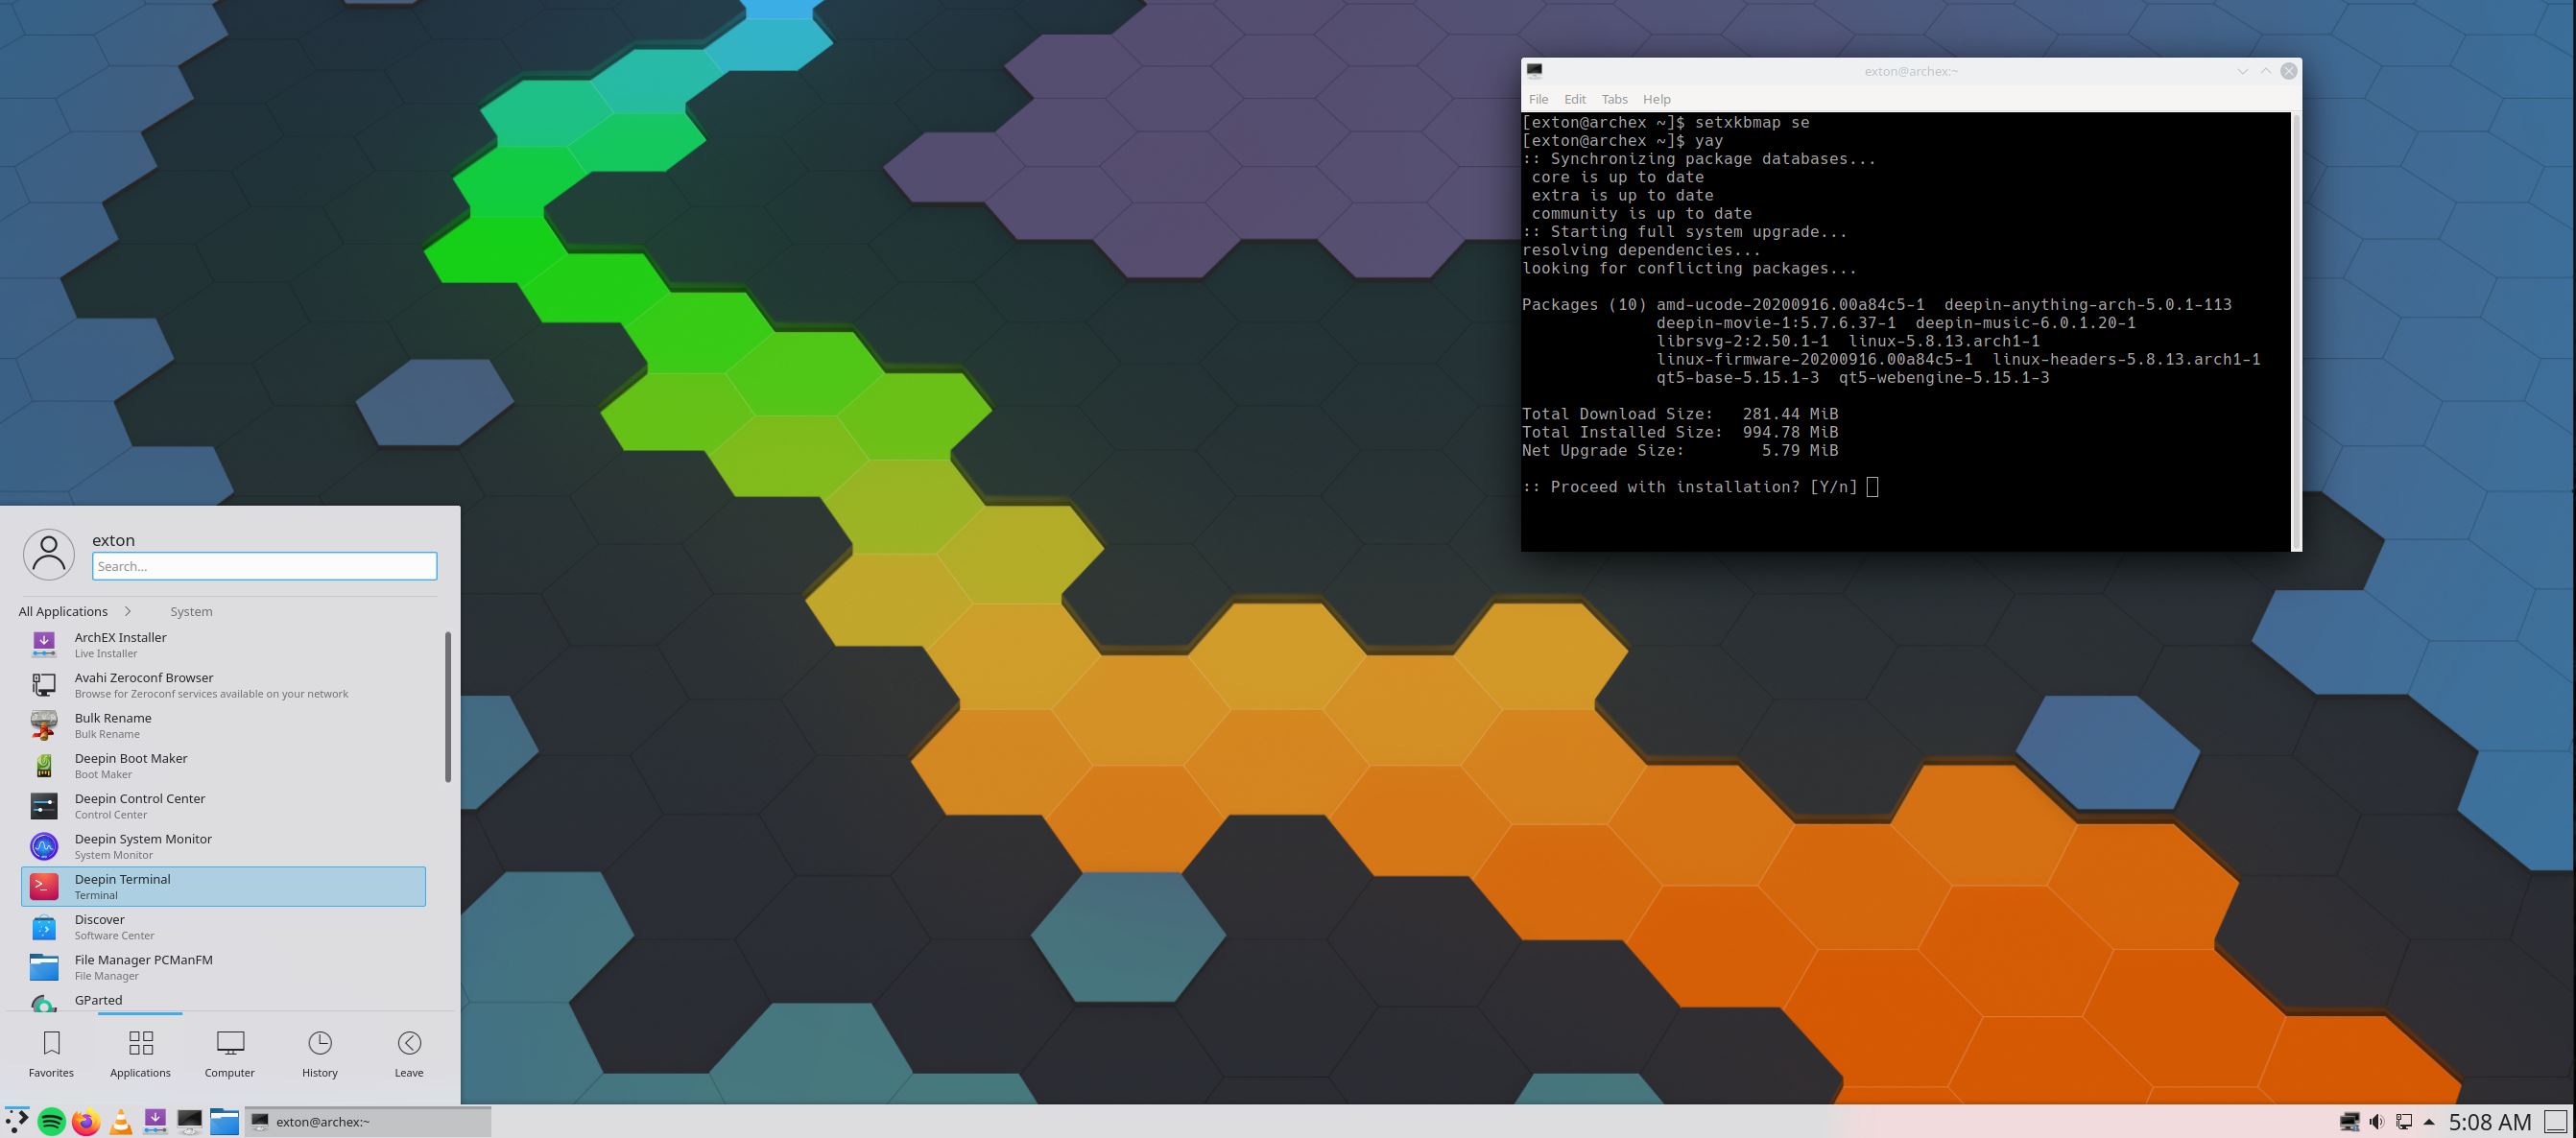
2. Then it was time to install Arch Linux on /dev/sda8. When the installation prompted installation of Grub2 during installation, I chose to install Grub2 on /dev/sda8. Such an installation of Grub2 does not affect the existing Grub2 installation in MBR. I did it just the same to find out “start data” for Arch Linux. I then read these start data from Mint in the /mnt/sda8/boot/grub/grub.cfg file.

3. After that I started Mint on /dev/sda7 again. Now it was time to get a real “multiboot computer” using Grub2. This is how I did it:
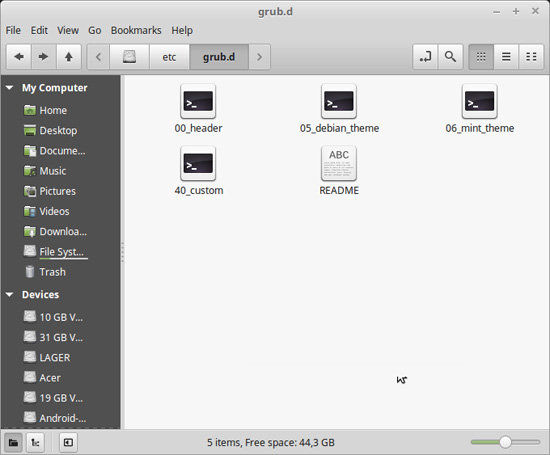
A) In /etc/grub.d I deleted all files except 00_header, 05_debian_theme, 06_mint_theme, 40_custom and README. Said folder then looked like this.


B)
I edited the /etc/grub.d/40_custom file to look like this. Note that this is how my 40_custom file looks like now when I have installed totally twelve Linux systems. The start data for Arch Linux (see above) was already fixed by looking at the /mnt/sda8/boot/grub/grub.cfg file. I could do it in a similar way when I installed the other eleven Linux systems.

Since this instruction is a bit old (from July 7, 2017) you can also have a look at the 40_custom file as it is today (211212) on one of my other computers – link.

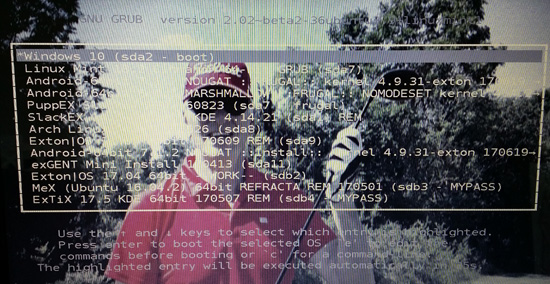
C) Finally, I ran the update-grub command. Then the /boot/grub/grub.cfg file (which is the file Grub2 “takes into account” at boot) was created/changed. This file (grub.cfg) should never be edited manually. Instead, edit the file 40_custom, as I showed above. Always use Leafpad or Mousepad (or a similar simple editor) when editing 40_custom. Never LibreOffice Writer or Word or the like of them. Study my present grub.cfg file. When I now start up my Acer Aspire the boot screen look like this.

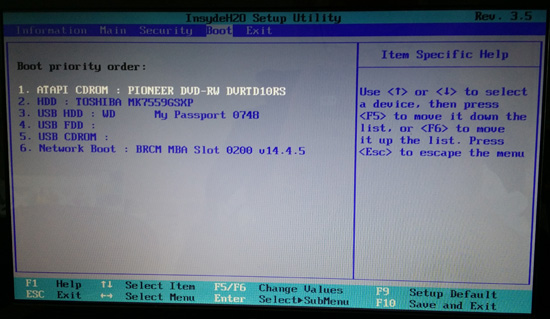
My BIOS settings on my Acer Aspire look like this.

Configuring Grub2 – Example for UEFI BIOS computers
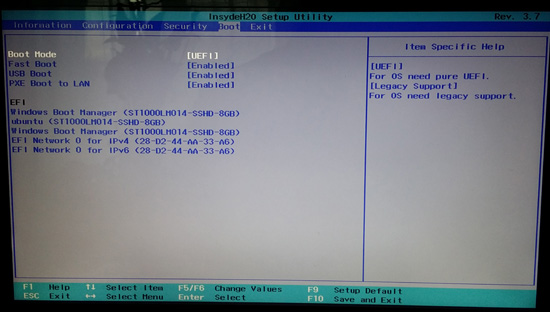
On another computer (laptop) Lenovo Z50 from 2015 I have Windows 10 installed together with three Linux systems. Ubuntu 17.04 and two Android-x86 systems. Since Windows 10 was installed in UEFI mode I also had to install Ubuntu 17.04 in UEFI mode to be able to configure Grub2 the way I describe above. I went into BIOS and changed the settings to look like this.

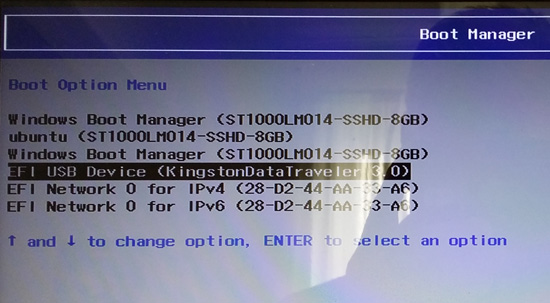
When I went into the boot menu in BIOS I could choose my USB stick. In this case Kingston DataTraveler – watch this screenshot.

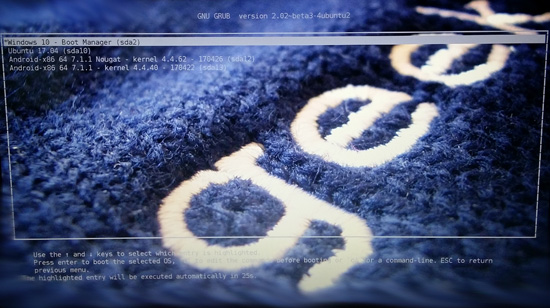
So I started up Ubuntu 17.04 from the USB stick and installed it on a partition I had created in advance using GParted. Since my Lenovo already had a ESP (EFI System Partition) I installed Grub2 onto that partition. When I now start up my Lenovo the boot screen looks like this. (You can of course install many more Linux systems if you like. Just edit /etc/grub.d/40_custom the way I describe above).

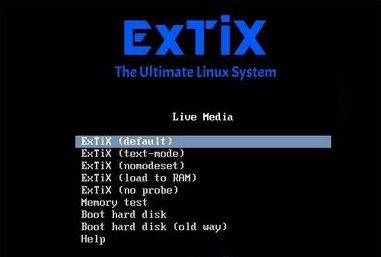
IMPORTANT: Identifying if the computer boots the Ubuntu DVD/USB stick in UEFI mode
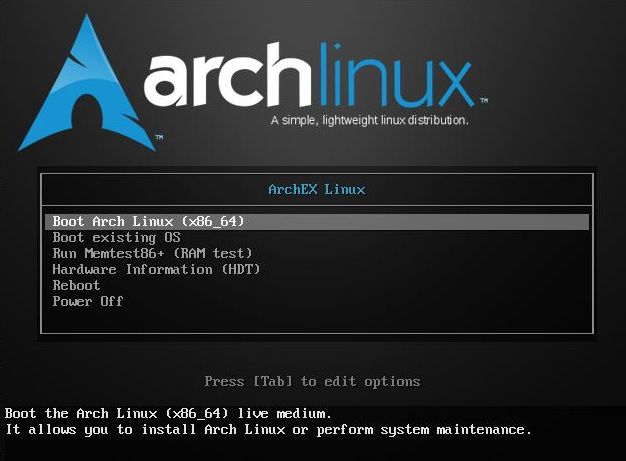
If the BIOS is set up to boot the DVD/USB stick in UEFI mode, then you will see the screen below.

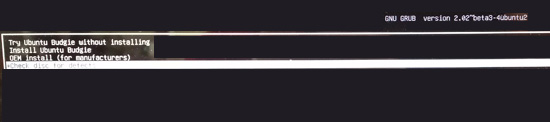
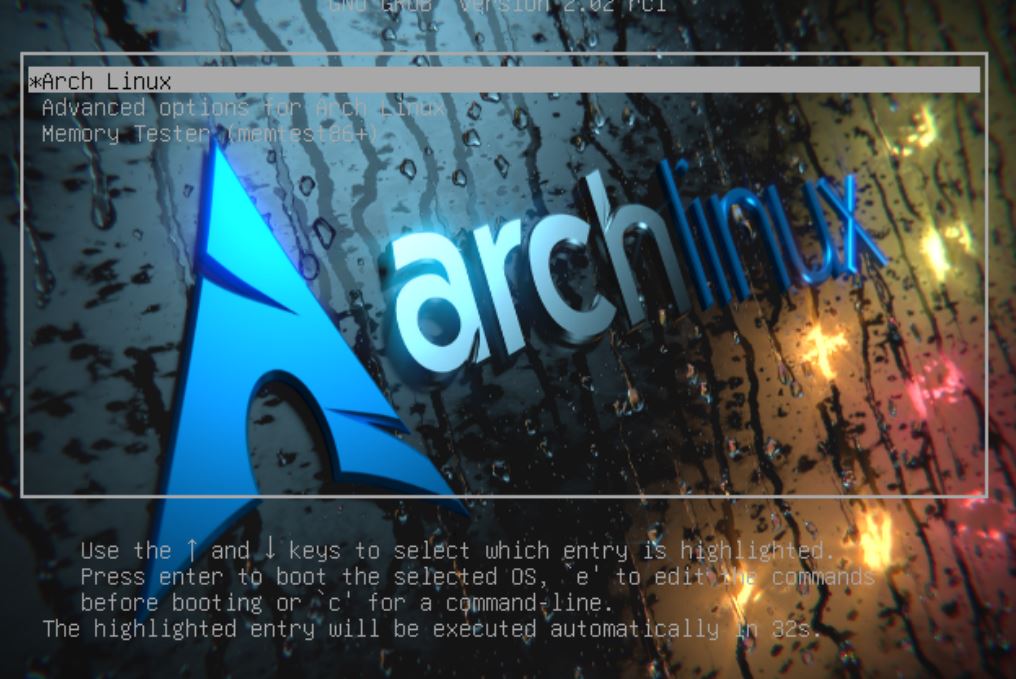
If the BIOS is NOT set up to boot the CD in UEFI mode, or if the disk is not 64-bit, then you will see the screen below.


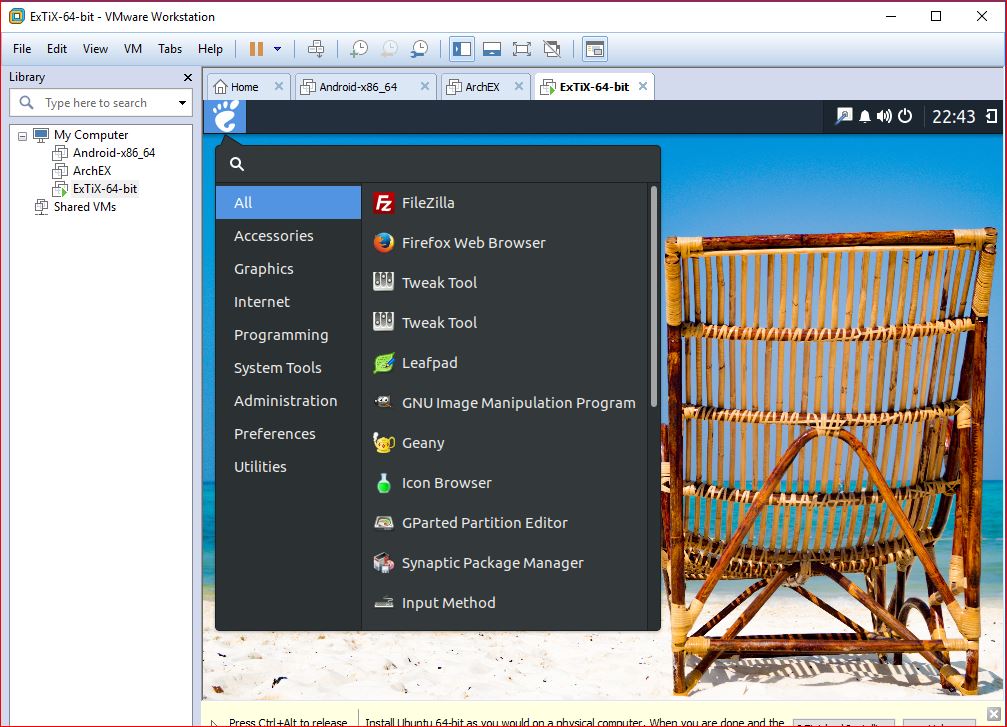
(ExTiX is based on Ubuntu)

Grub2 bootsplash
One of the benefits of Grub2 is that you can have a nice high resolution image as bootsplash/grub boot image. The image may have the same size as the resolution on your screen can handle, for example 1366×768. It is common with a regular image in jpg, png or tga format. Just place the image in /boot/grub and run the update-grub command. If you get the answer that the image is found in /boot/grub it will work. If not, try editing the /etc /default/grub file and add the line
GRUB_BACKGROUND = “/boot/grub/MyNicePicture.png”
Then run the update-grub command again (and restart the computer).

Have a look at my /etc/default/grub file.

Change the text – font and size – which Grub2 shows at boot

Run the following command:
grub-mkfont –output=/boot/grub/DejaVuSansMono.pf2 –size=24 /usr/share/fonts/truetype/ttf-dejavu/DejaVuSansMono.ttf
(Maybe you’ll need to run the command (apt-get install ttf-dejavu first). Then edit the /etc/default/grub file and add the following line.
GRUB_FONT=/boot/grub/DejaVuSansMono.pf2
Run the update-grub command again. After rebooting, the Grub2 boot menu will surely look better (depending on how your boot image looks like).

40_custom on my Lenovo Z50 computer as of today (211212) – see above
Since this instruction is a bit old (from July 7, 2017) you can also have a look at the 40_custom file as it is today (211212) on my Lenovo Z50 laptop – link.

############################################

Good luck!

/exton

Read about my Android-x86 Systems – 10, Pie, Oreo, Nougat, Marshmallow, Lollipop and KitKat at
andex.exton.net – latest is AndEX 10 (with GAPPS) and AndEX Pie 9.0 (also with GAPPS)!
and

about my Android 11, 10, Pie, Oreo, Nougat, Marshmallow and Lollipop versions for Raspberry Pi 4 and 3/2 at
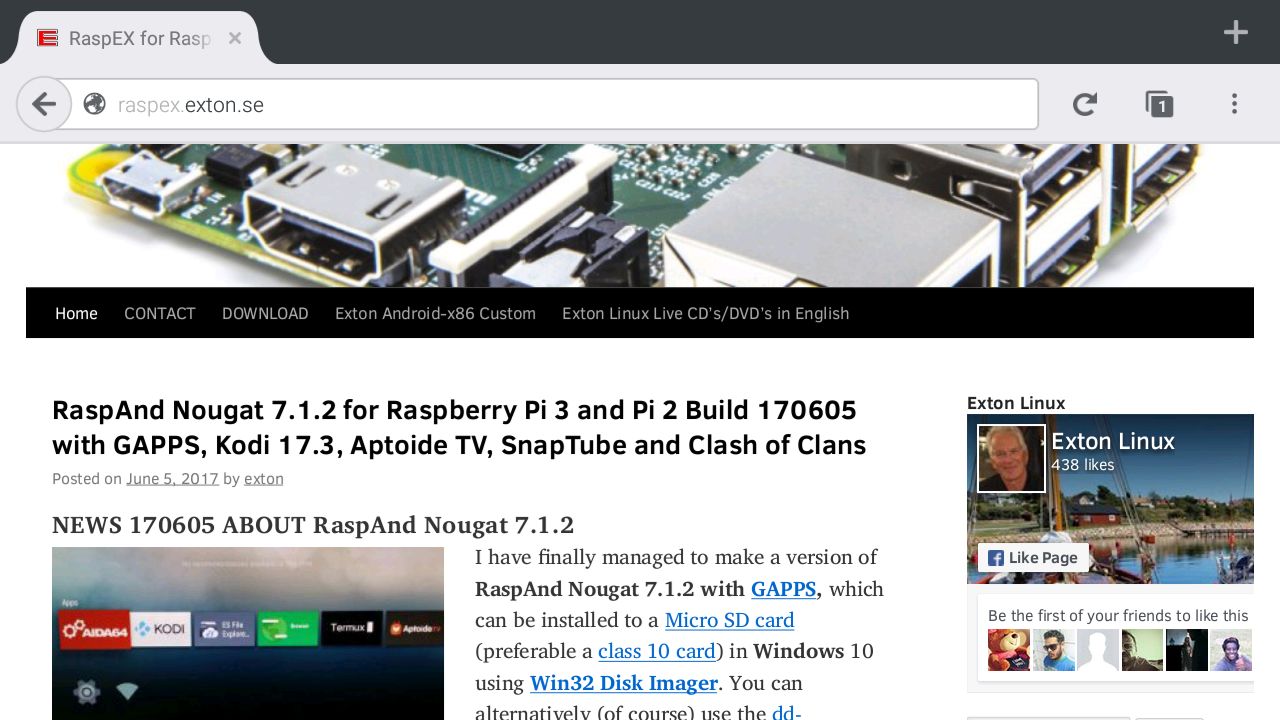
raspex.exton.se
– latest is RaspAnd 11 (with GAPPS) and RaspAnd Oreo 8.1 (also with GAPPS)!
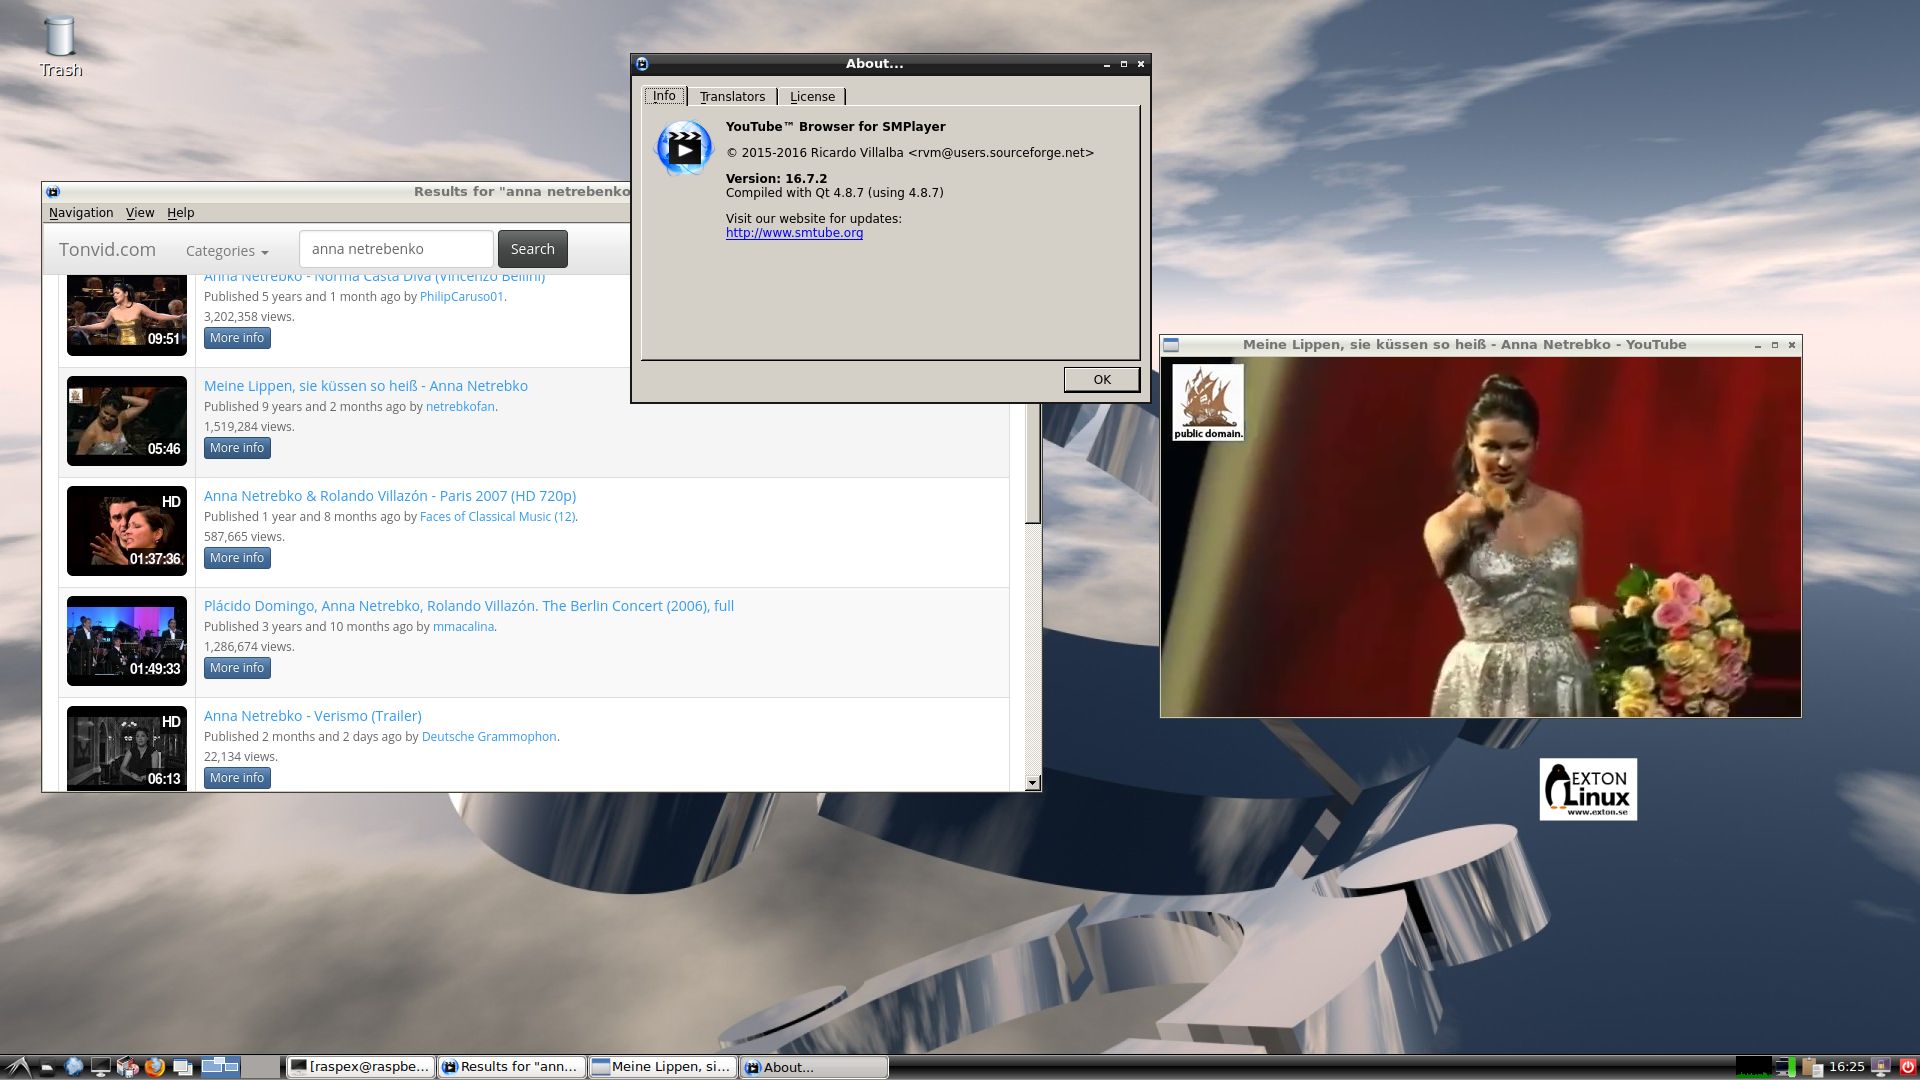
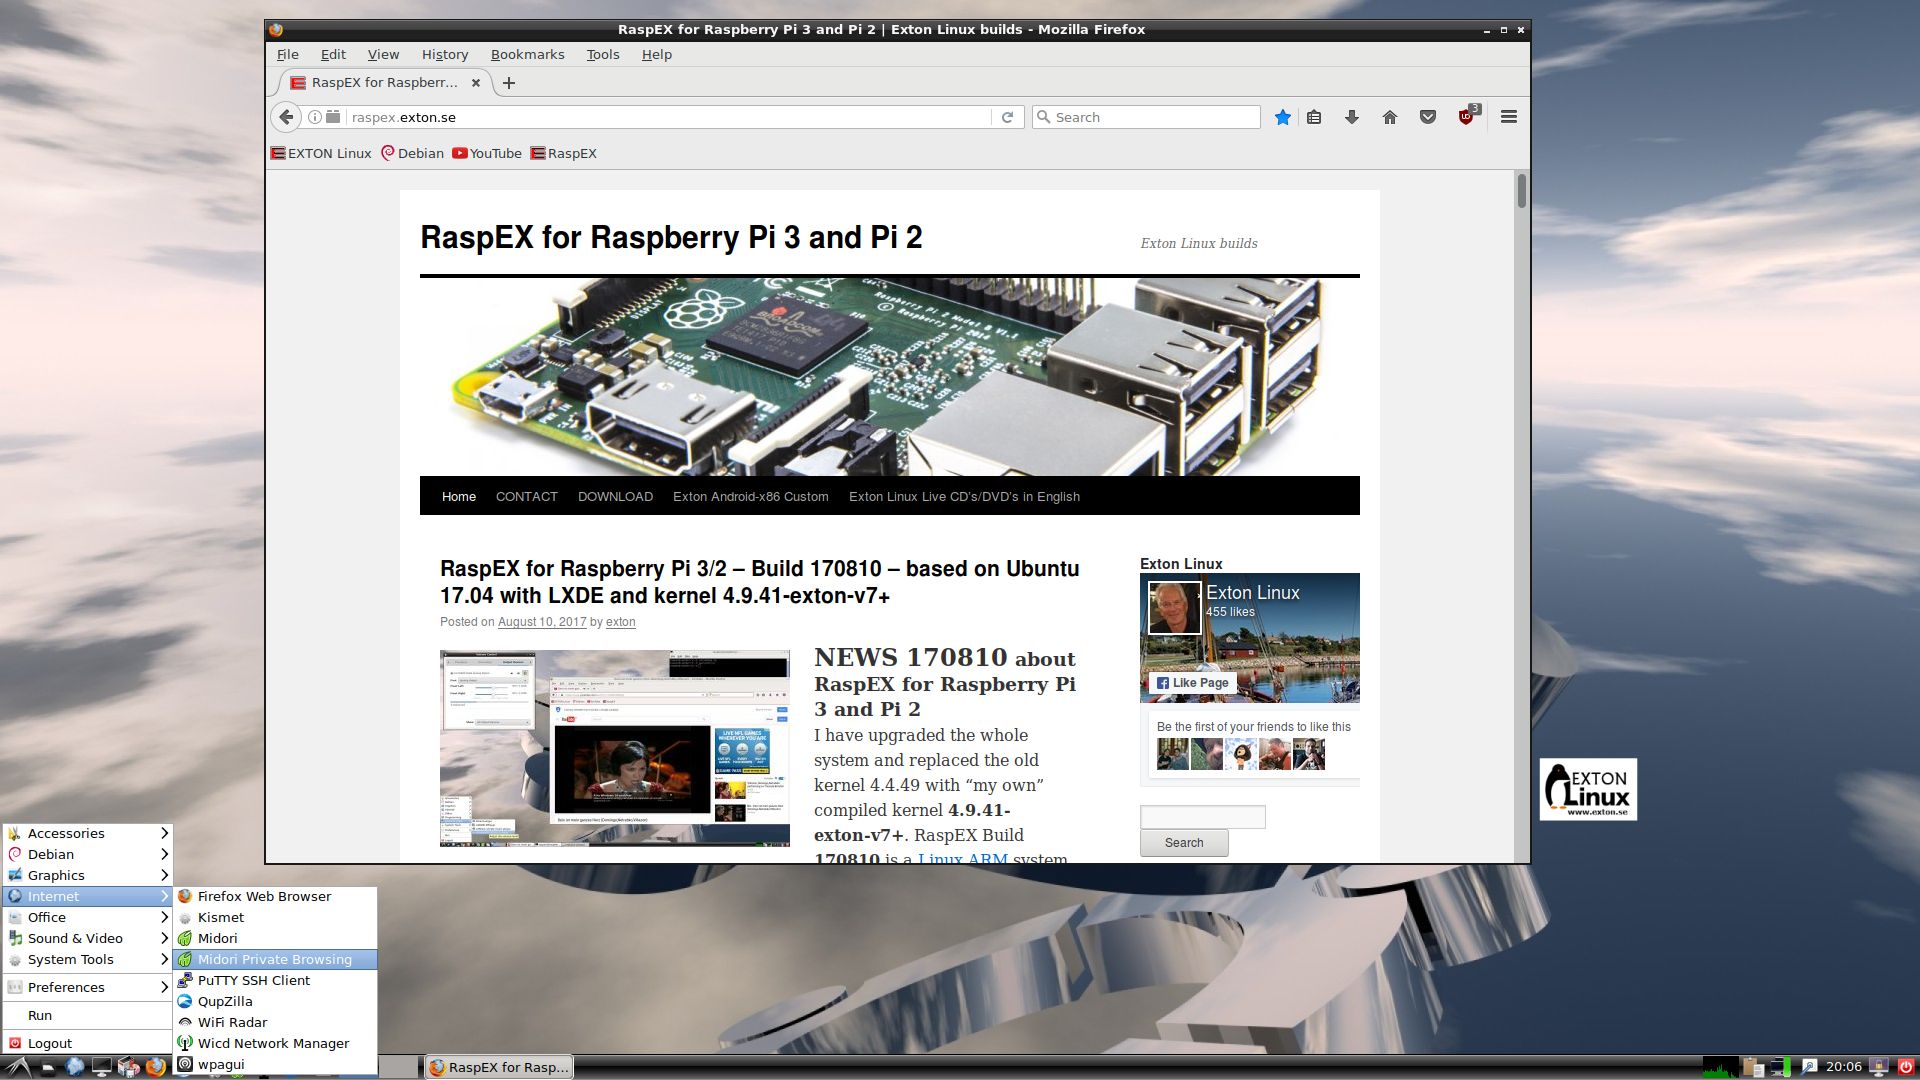
Create your own Linux distro based on ExTiX 17.5/Ubuntu 17.04!

In ExTiX 17.5, Build 170508, with KDE 4.16.12 and KDE Frameworks I have included (pre-installed) Refracta Tools, which makes it possible for you to very easy and fast make your own Ubuntu 17.04 (or Ubuntu 17.10) distro.

Important about Refracta
You can use the Refracta Tools (pre-installed in ExTiX 17.5) to create your own installable Ubuntu 17.04 Live DVD once you have installed ExTiX to hard drive. I mean change everything and then create a whole new Ubuntu live system. Start Refracta from Menu >> System >> Create a live CD snapshot of your system. You don’t even have to install ExTiX to hard drive before you can use the Refracta tools. If you have plenty of RAM you can create a new (your own!) Ubuntu system while running ExTiX from DVD or a USB stick. Please note that the whole Refracta process (creating your new ISO) will only take 5 – 10 min! You’ll find the ISO in /home/snapshots. The whole thing is very simple. Watch a sideshow below about how to use Refracta Tools. I.e. create a snapshot of your ExTiX/Ubuntu system.

Good luck!
/exton

Read about my Android-x86 Systems – Nougat, Marshmallow, Lollipop and KitKat at
andex.exton.net
and about my Nougat, Marshmallow and Lollipop versions for Raspberry Pi 3/2 at
raspex.exton.se 

ArchEX (Arch Linux) with LXQt, kernel 4.11.6-3-ARCH, Firefox 54.0, Yaourt and Calamares installer – Build 170626

NEWS 170627 about Calamares Installer
I’ve finally managed to make Calamares (The universal installer framework) work without problems/issues. Yesterdays version of ArchEX has therefore been replaced today. Now you can use Calamares to install ArchEX in any language. The boot loader Grub2 (which can be installed during the installation of ArchEX) will also work without problems.
Watch the slideshow below showing all installation steps.

WHAT IS ArchEX?
ArchEX 64 bit is a new (170626) Linux live DVD based on Arch Linux. Arch motto is KISS (Keep It Simple Stupid). ArchEX uses kernel 4.11.6-3-ARCH and the LXQt Desktop environment. LXQt is a lightweight Qt desktop environment. It will not get in your way. It will not hang or slow down your system. It is focused on being a classic desktop with a modern look and feel.

INSTALLED SOFTWARE
Among many other programs, Firefox 54.0 (for Netflix), Gimp, GCC, Wicd and GParted – study this package LIST.

WHO should run Arch Linux?

My answer: The system fits the “advanced” Linux user/enthusiast, who would be willing to run an occasional command from time to time.

BENEFITS of ArchEX/Arch Linux
“Cutting Edge”-software and speed. You will for example always run the latest kernel if you upgrade ArchEX/Arch (for example) every month.

ArchEX screenshots
ArchEX LXQt Desktop
ArchEX starting up live
ArchEX starting up from hard drive (VirtualBox)
ArchEX Installer (Calamares) running
When Cinnamon is installed (pacman -S cinnamon)
When Xfce4 is installed (pacman -S xfce4)
When KDE (Plasma) is installed (pacman -S plasma-meta and pacman -S kde-applications-meta)
When Enlightenment is installed (pacman -S enlightenment)
ALL extra desktops can be installed in about 10 min!

READ MORE…

Android-x86_64 Nougat 7.1.2 – Build 170619 – with GAPPS and kernel 4.9.31-exton-android-x86_64

News 170621 about AndEX 7.1.2
Yesterday I said that AndEX 7.1.2 couldn’t run in VirtualBox and VMware. Actually it can! It just takes about 10 min for the Desktop to show up when running AndEX live. (I mean directly from the ISO file). Watch this screenshotVirtualBox and this screenshot – VMware. Just give AndEX enough RAM. I gave AndEX 3GB. You can (of course) also install AndEX to a virtual hard drive in VirtualBox and VMware. The system will be very responsive then.

NEWS 170619 about AndEX Nougat 7.1.2
My new build of Android x86_64 – android_x86_64-7.1.2-nougat-gapps-kernel-4.9.31-exton-990mb-170619.iso can be installed to hard drive or on a USB stick. You can also run the system live. I.e. from a DVD or a USB stick. On some computers you’ll have to start up AndEX 7.1.2 in compatibility mode (VESA) though. GAPPS and all other apps mentioned below are installed. NOTE: You can run AndEX Nougat Build 170619 on newer laptops and Desktop computers. Sound won’t work on all though – see below. The video performance is generally very very good.

Screenshot
– AndEX Build 170619 – the Desktop

MORE NEWS 170619: AndEX – Nougat 7.1.2 with kernel 4.9.31-exton-android-x86_64 and GAPPS
My new build of Android-x86_64 Nougat 7.1.2 have GAPPS pre-installed. I.e. Google Play Services 11.0.55, Google Play Store 7.9.52-Q-all, Aptoide App Manager, Google Play Games 3.9.08 (needed for Clash of Clans to run), Gmail 7.6.4 and YouTube 12.14.56. Also many other apps. For example: Spotify 8.4.4.810, Clash of Clans 9.24.16, File Manager 2.0.0.355, HD Camera Ultra 2.3.1 (works very well), Google Maps 9.50.2, SnapTube 4.3.0, Firefox 54.0 (latest version) and Rotation Control Pro 1.1.9.

PREREQUISITE
The system can be installed manually to hard drive. To be able to do that you must have at least one Linux system installed on your hard drive. You must also use Grub as boot loader. You can also (or alternatively) install AndEX 7.1.2 while running the system from a DVD or from a USB stick. Use preferable Rufus to create a bootable USB stick. Or burn the ISO file (android_x86_64-7.1.2-nougat-gapps-kernel-4.9.31-exton-990mb-170619.iso) to a DVD and run the system from it.

ABOUT Andex Nougat 7.1.2
My compiled Android-x86_64 system (Nougat 7.1.2) can run live or from hard drive on certain computers. The system can run and be installed on almost all newer laptops (and some Desktop computers). For example Acer (Aspire), HP, Samsung, Dell, Toshiba, Lenovo, Thinkpad, Fujitsu, Panasonic and Asus laptops. I can also mention that I could run my new Nougat version without problems on a HP Pavilion 500-317no Desktop Computer. The Android-AndEX 7.1.2 system is distributed in the form of a Zip file and a ISO file. You can do a manual installation to hard drive. That can even be done to a drive where you already have another Linux system (for example Ubuntu 17.04) installed. That’s sort of a Frugal Installation (normally used by Puppy Linux). Read more about different installations of AndEX Nougat 7.1.2 at the INFO site.

Android Nougat 7.1.2 was released 170403.

What’s the point?
Well, if you like your Android phone and all the apps you have installed on it I’m sure you will also like to run apps from your laptop. Bigger screen and better sound etc. Also: In AndEX Nougat Build 170619 almost all apps and games can be installed via Google Play Store. You can even install very big games (of 1GB or so), but unfortunately almost all such games need a touchscreen. Clash of Clans (pre-installed) works very good though. So does Angry Birds. Still not convinced? Then read my article about “How useful an Androx-x86 system can be for the average computer user“.

Screenshots
Screenshot 1 – Nougat boot animation (which you must see during the boot. If not, the installation was unsuccessful)
Screenshot 2 – AndEX Nougat 7.1.2 Desktop
Screenshot 3 – AndEX Nougat 7.1.2 – Google Play Store running
Screenshot 4 – AndEX Nougat 7.1.2 – Aptoide App Manager running
Screenshot 5 – AndEX Nougat 7.1.2 – Spotify running
Screenshot 6 – AndEX Nougat 7.1.2 – Showing all installed apps

READ MORE…

RaspAnd Nougat 7.1.2 for Raspberry Pi 3 and Pi 2 Build 170616 with better video performance, GAPPS, Kodi 17.3, Aptoide TV, Firefox 54.0 and Clash of Clans

NEWS 170616 about RaspAnd Nougat 7.1.2
A new version of RaspAnd Nougat 7.1.2 is ready. Most important change: YouTube works very well! The video performance in RaspAnd Build 170616 is generally much better than in build 170605. Example of perfect video quality while running YouTube.

Download RaspAnd Build 170616…

MORE NEWS 170616 ABOUT RaspAnd Nougat 7.1.2
I have finally managed to make a version of RaspAnd Nougat 7.1.2 with GAPPS, which can be installed to a Micro SD card (preferable a class 10 card) in Windows 10 using Win32 Disk Imager. You can alternatively (of course) use the dd-command in a Linux system. Unzip the downloaded file raspand-nougat-7.1.2-gapps-kodi-aptoide-tv-clashofclans-firefox-701mb-170616.zip. Then open a terminal and run the command dd if=raspand-nougat-7.1.2-gapps-kodi-aptoide-tv-clashofclans-firefox-7400mb-170616.img of=/dev/sdX bs=1M
(Change X to b, d or…).

What’s the point with Win32 Disk Imager?
Well, until now you had to have some basic knowledge about Linux to be able to install RaspAnd 7.1.2. Now you don’t need any special knowledge at all! (Just some basic computer knowledge). When you use Win32 Disk Imager it will look like this.


MORE ABOUT RaspAnd

RaspAnd Nougat 7.1.2 Build 170616 is an Android 7.1.2 Nougat system which can run on Raspberry Pi 3 and Pi 2. I have included the following apps:
1) GAPPS (Google Play Services, but not Google Play Store)
2) Kodi 17.3 (latest version which “allows users to play and view most videos, music, podcasts, and other digital media files from local and network storage media and the Internet”. YouTube is enabled and working very well!)
3) Spotify TV 1.2.0 (working very very well)
4) Rotation Control Pro 1.1.2 (which you may or may not need)
5) Google Play Games 3.9.08 (needed for Clash of Clans to run)
6) Clash of Clans 9.24.9 (working very well!)
7) Gmail 7.4.23
8) Aptoide TV 3.2.1 (for installing new apps – many many apps can be installed!)
9) ES File Explorer Pro 1.0.8 working very well
10) Firefox 54.0 (latest version – working very well)

ABOUT Android 7.1.2
Version 7.1.2 is the latest Android system by now. Released on April 8, 2017. The system is used in very few mobile phones (as far as I know).

Screenshots
Screenshot 1 – Nougat boot animation (which you must see during the boot. If not, the installation was unsuccessful)
Screenshot 2 – RaspAnd’s Desktop
Screenshot 3 – Kodi running
Screenshot 4 – ES File Explorer running
Screenshot 5 – Spotify running
Screenshot 6 – Firefox running
Screenshot 7 – YouTube running
Screenshot 8 – YouTube running with perfect video quality
Screenshot 9 – Aptoide TV running

READ MORE…